We bought a new bed.
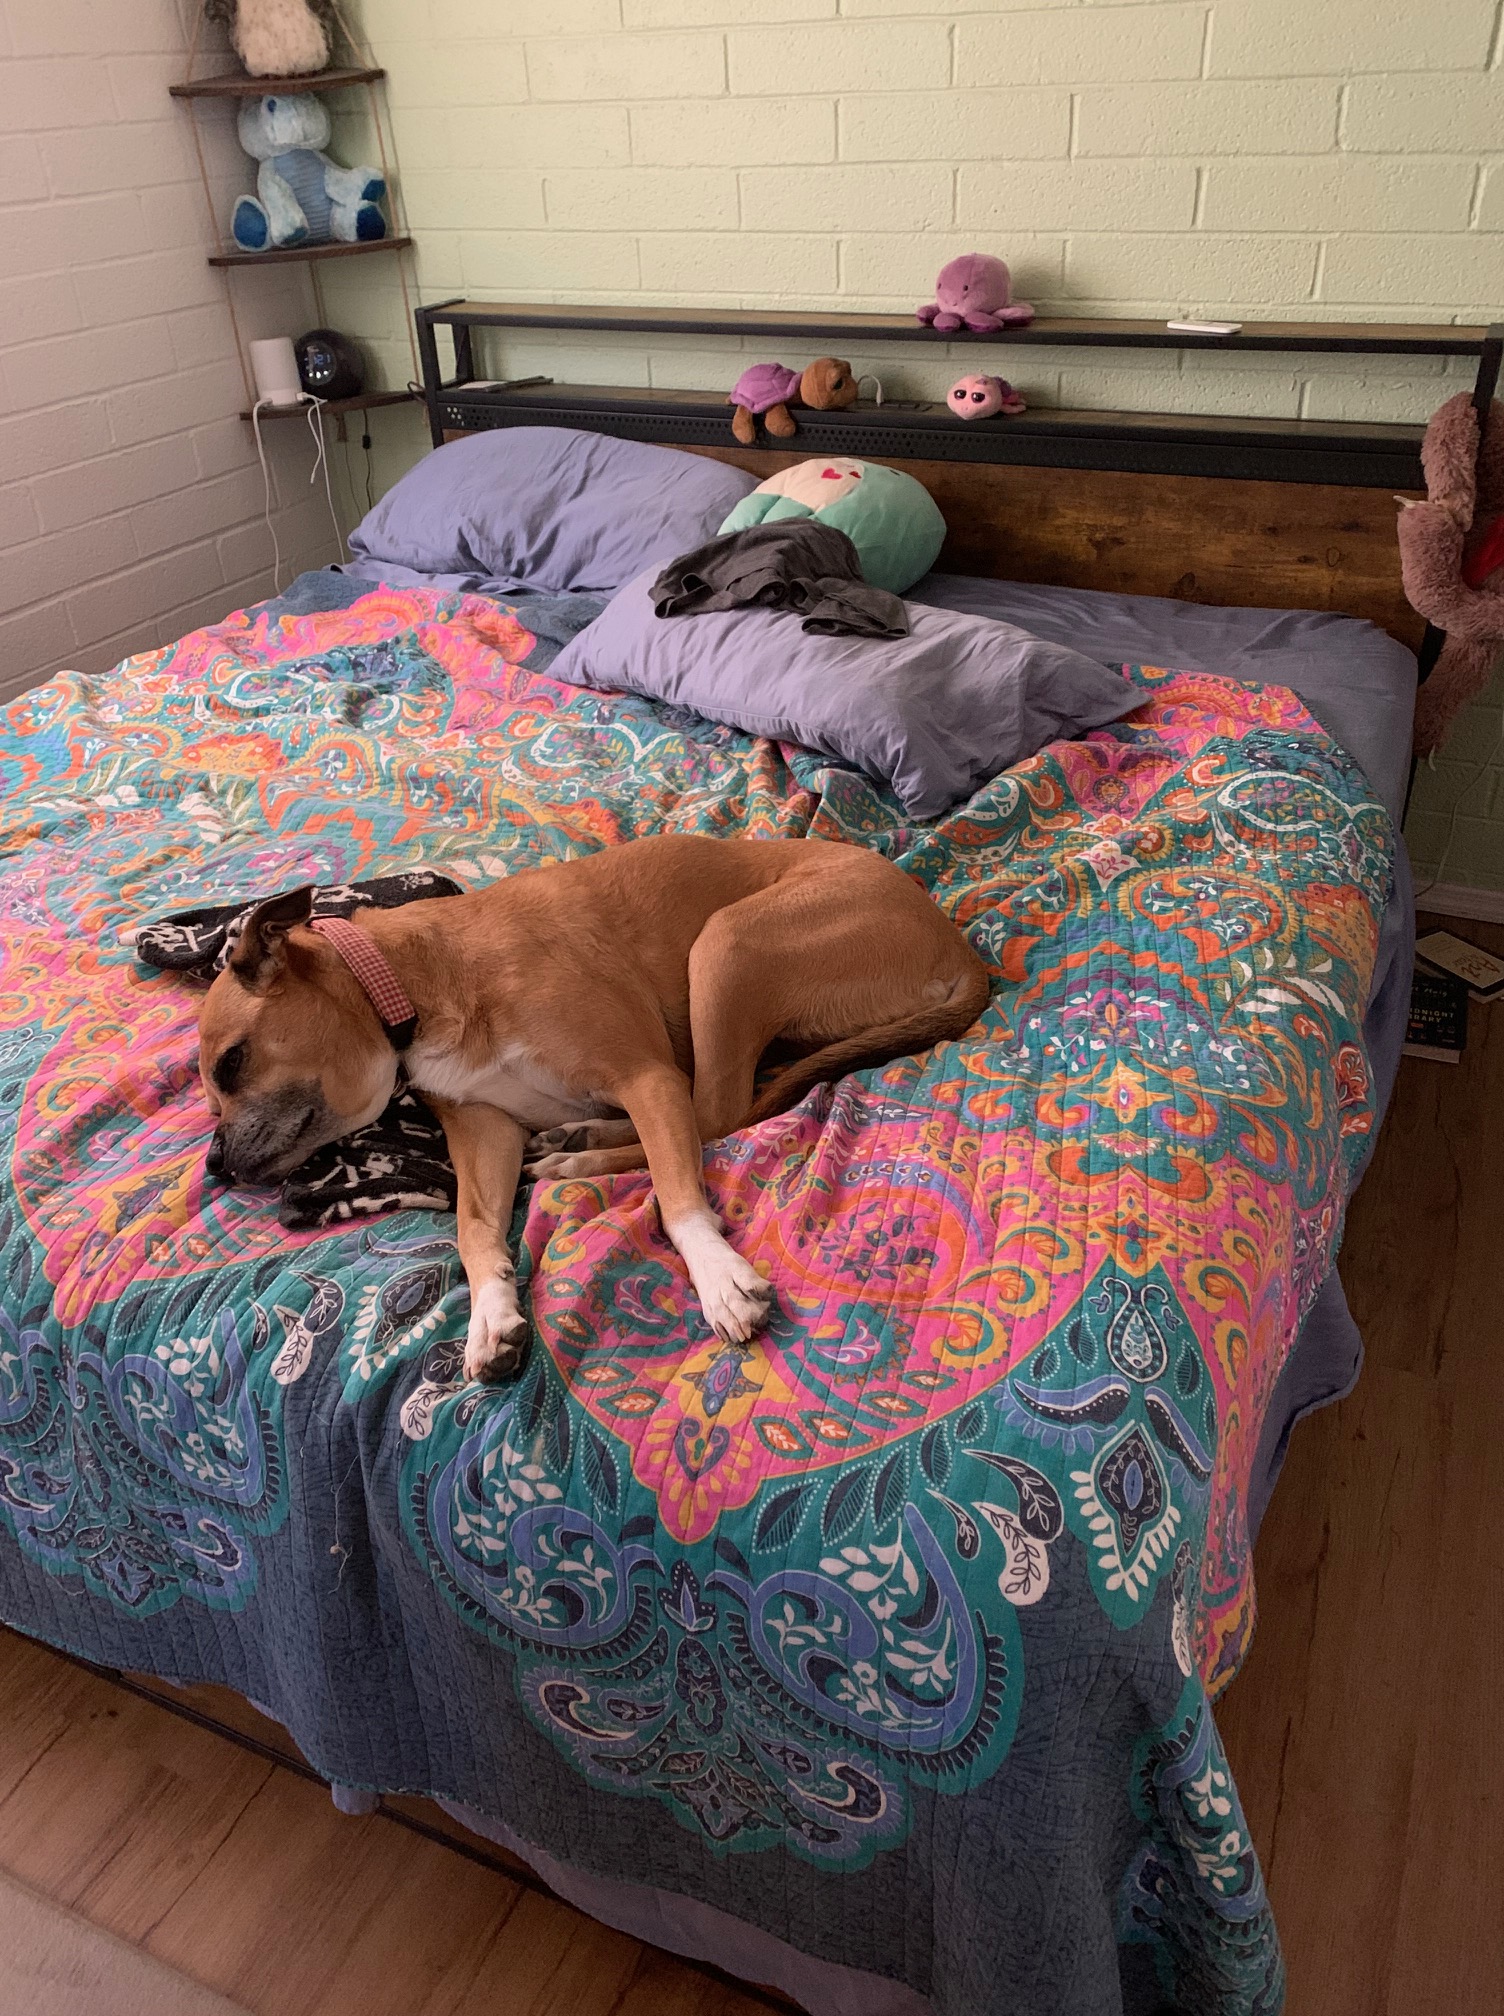
Rather, we bought a new bed frame: a platform, because we want to lower the bed height, since we have a dog who is approaching Senior Dog status, and our dog Charlie developed arthritis in his shoulders partly from jumping down off of our bed, before we got him a ramp. We are going to go out and buy a new mattress, but we have to work up to that, because mattress shopping is the one activity guaranteed to turn me into a Boomer: the only time in my life I have complained audibly about how expensive something was was in a mattress store in Portland, Oregon, the first time I saw a premium mattress priced at five figures. “Jesus Christ, we’re not buying a car!” I was heard to say as my wife hustled me out the door like a drunk at a retirement party.
So we started with the frame: and partly to save money, we bought it online and had it shipped to us, which saved us a couple hundred dollars, and the headache of finding a truck that could haul a bedframe home.
Plus: it got us these directions. Which I am now going to share with you, in case you decide you want to buy a BTHFST LED King Bed Frame with USB Ports & Charging Outlets, Metal Platform Bed Frame with 2-Tier Shelf Headboard, King Bed with LED Lights, Upgraded Double-Row Support Bars, Noise-Free, Vintage Brown.
First of all: yes, we bought it on Amazon, and it came from China. I looked, hard, and the only other options, apart from a dozen different Chinese clones providing exactly the same bed frame for slightly different prices, were bed frames from Vietnam, and one absolutely gorgeous bed frame from Scandinavia. The Vietnamese frames were twice the price of the Chinese frames, with no less carbon cost in shipping and human cost in worker exploitation; the Scandinavian bed frame was literally eleven times the price — $200 vs. $2200. I would love to buy responsibly and ethically with every purchase I make.
But I just needed a new bed.
So here we go.

First of all, please note that these directions are stapled together. Badly. Secondly, please appreciate with me the lightbulb graphic at the bottom of the page. Is that representing an idea? The beacon summoning us to the land of comfort? Well, maybe they’ll figure it out when they go to version 1.2.
It is a decent depiction of the frame itself, I will say.
Next page.

This is my favorite page of the instructions. Everything about it is excellent. I was in fact going to put this thing together by myself, but after seeing this, I asked my wife to be my second panda. Needless to say, we did not install the frame violently; we also did not call for help, though we did look online for videos showing the finished product. Because I frequently thought “?!” while trying to understand these directions.
One caveat: the first panda — the only one with natural coloration, for some reason? — is not showing the correct tools needed for this. A drill or impact driver would be handy as there are a large number of bolts to tighten; but they’re all hex bolts, which would require a hex-bolt attachment inserted in the end of that adaptor that is shown. Which attachment is not shown. It’s okay though: as with every other piece of some-assembly-required furniture ever sold, the kit came with two Allen wrenches. Which were what we used.
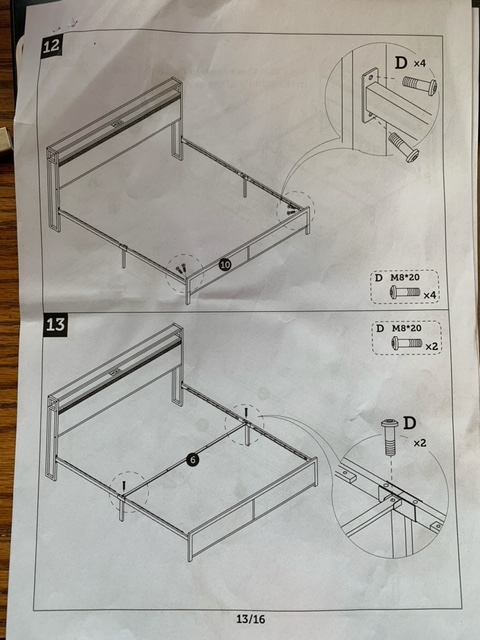
The bolts and various parts were depicted on the next page.
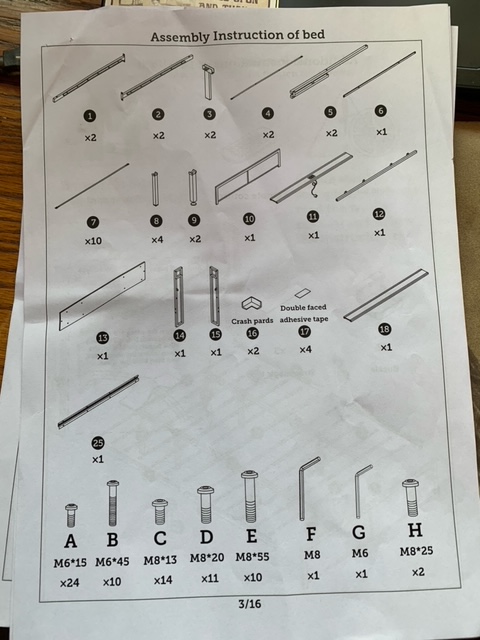
These are, naturally, not to scale; but fortunately, almost every piece of the bed was clearly labeled with a sticker bearing the appropriate number, which was genuinely helpful. Also note the quirky angle chosen to depict the two Allen wrenches (F and G at the bottom) which were, as you might assume, simply bent at the usual 90-degree angle, not this more obtuse choice shown here. Which, to me, gives them an air of looking far away, at the distant horizon…
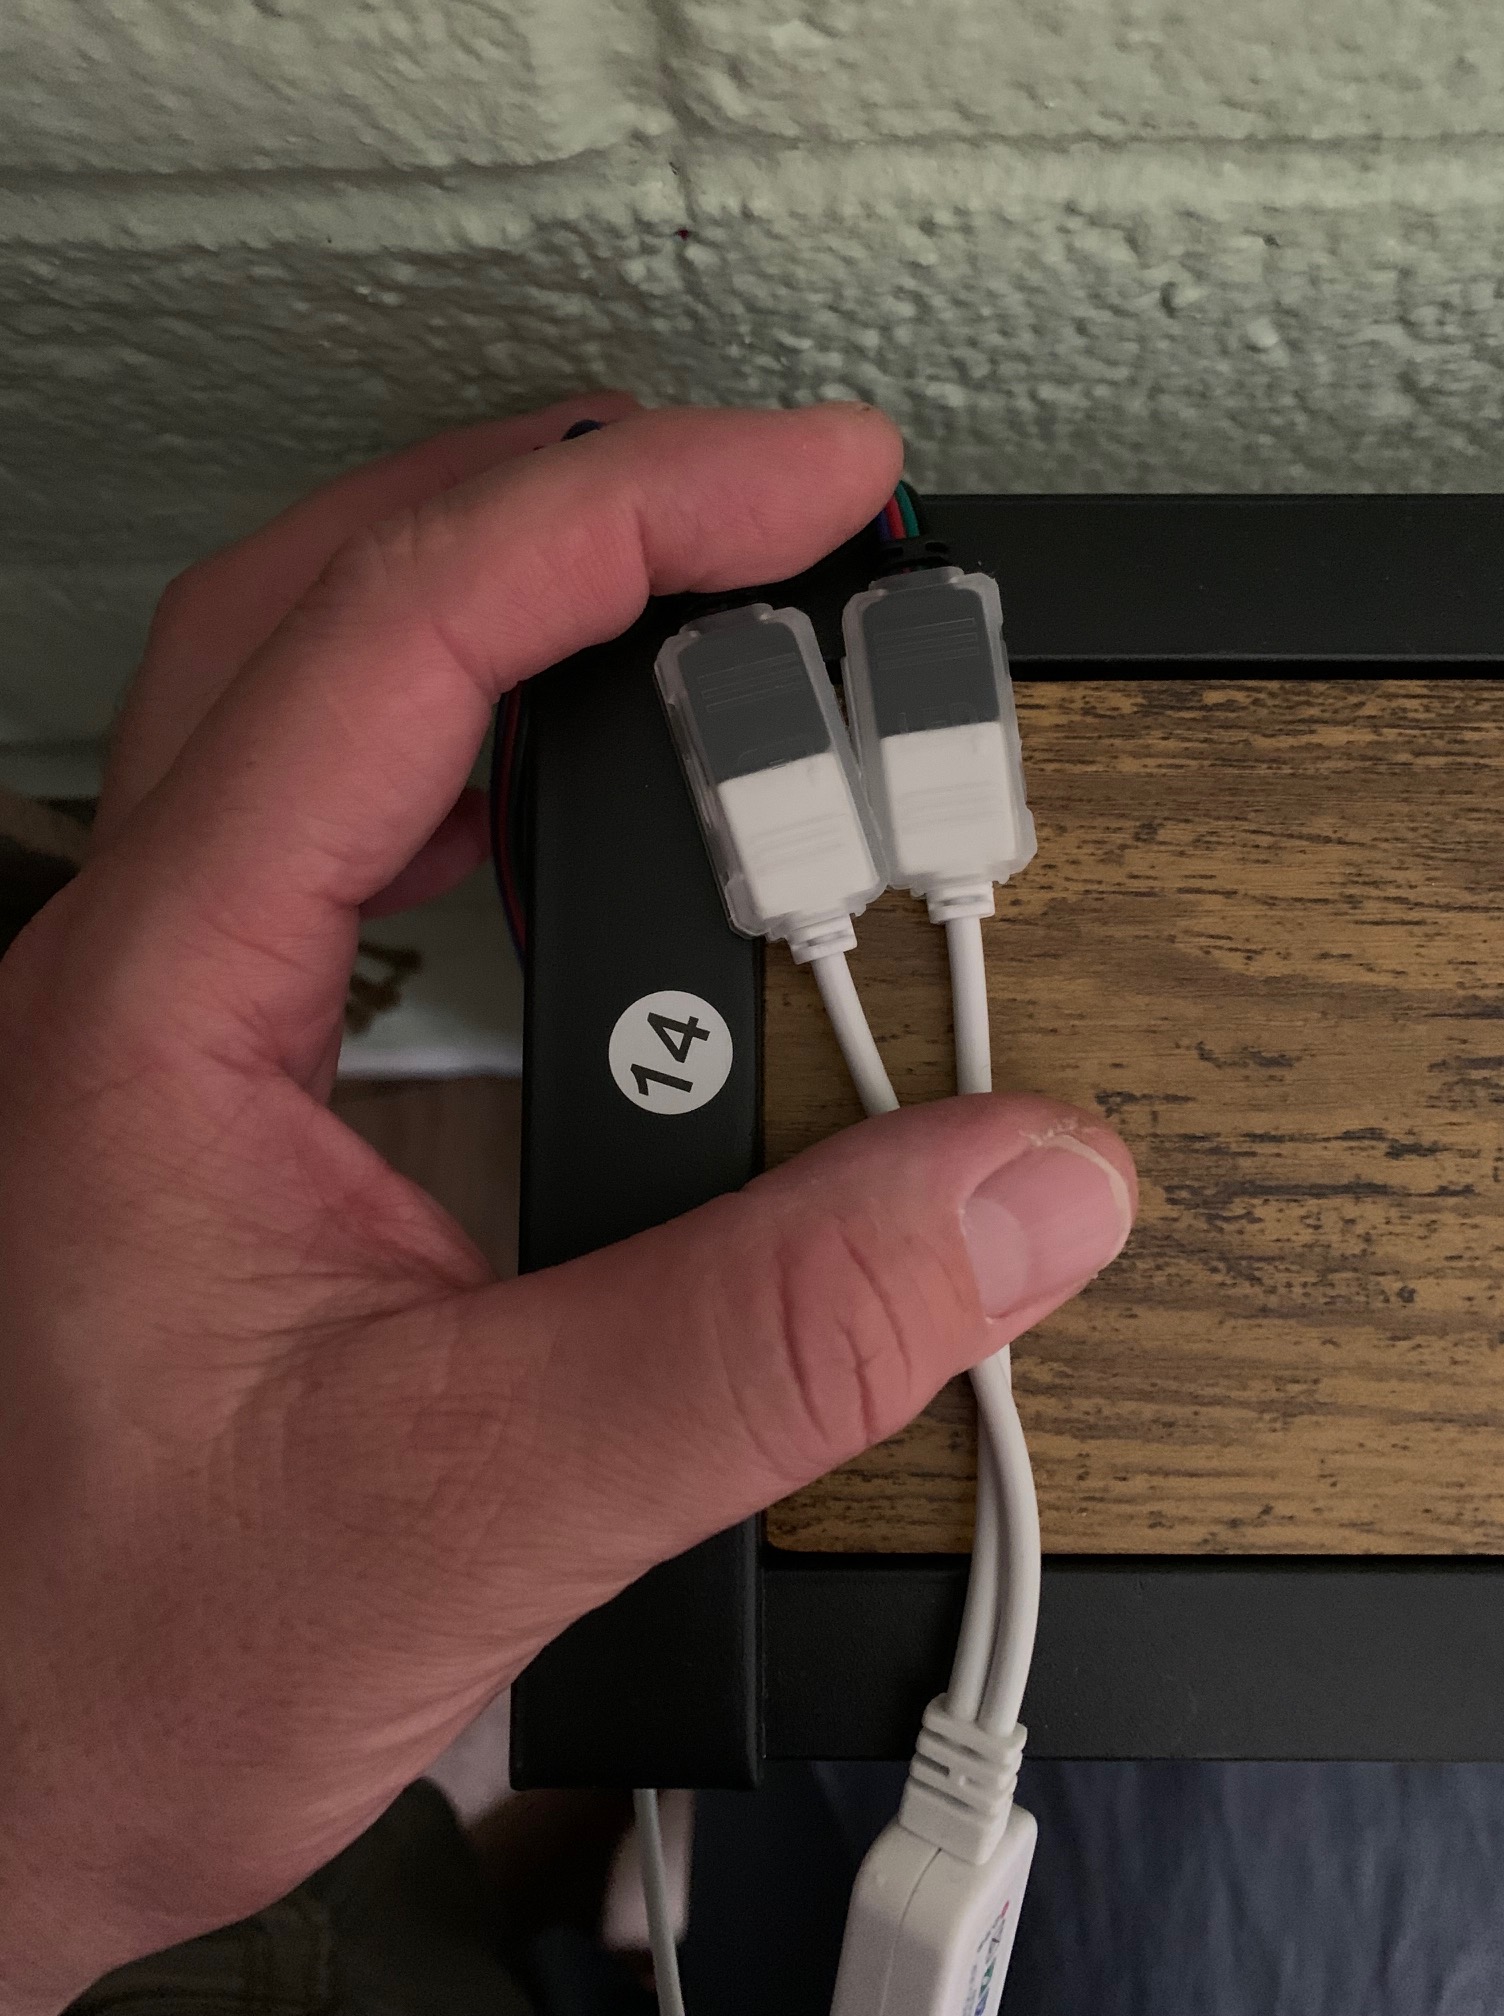
Here is one of the number stickers on the now-assembled bed, along with the “buckles” depicted on the next page, which caused us some trouble because the images are not to scale; please note that the actual buckles, in addition to being clear plastic and shipped inside a ziplock bag along with the Strap magic tape, are the size of a half a stick of gum or one knuckle of my big fat fingers.
Also on that last page, I am curious about why Assembly and Instructions were capitalized — but not “bed,” which seems like the critical word here. The questionable capitalization continued with the next header:
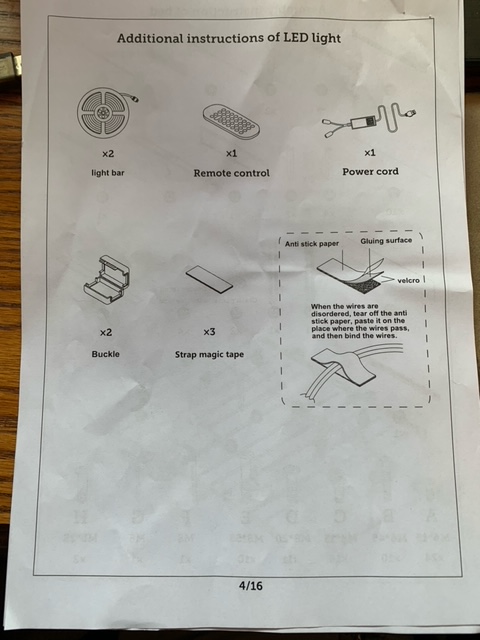
This time, Additional is capitalized but instructions is not; LED is, but light is not. More to the point, these are not the instructions for installing the LED: this is still the list of included materials. (Though there are some instructions for how to use the “strap magic tapes” in case the “wires are disordered” and need — errr — “binding.” A rather uncomfortable choice of word for me, coming from China.) Also that is definitely not a light “bar,” it is a cord wound around a spool like an old movie reel, as it looks in the illustration. Also, this may have just been a mistake at the factory, but we got three of them, not two.
Back to the instructions.

Way too many numbers. Far too many pieces. And I’m sad that my wife and I are no longer cooperative pandas — though at least we’re holding hands, or bumping rounded arm-ends or something. Also: who the hell is assembling this thing on a slope?! And why can’t I tighten the screws?!

Okay: so this page is the worst page in the — errrrr — “manual.” First of all: it tells you to do this first (See the number 1 in the top left). This is a bad idea. The light strip can easily and more rationally be placed once the headboard is assembled. Secondly, I had no idea what I was actually looking for in terms of this light “strip.” Here is the actual thing (this is the extra one still on the spool.)

It’s a strip. Like a piece of double-sided tape. So if you pull it out, you don’t “unfold” it, and it doesn’t end up in that angular ladder-shape — which was fine, it was obvious this was the LED strip regardless of their eccentric word choice in English; but that line about you can unfold it into TWO strips confused me. No, there are two reels with one strip apiece, each about six feet long. And we got three reels for some reason. But I was confused: was I supposed to cut the one strip in half to make two? And okay, then it says “One side of the light bar is sticky and the other side is luminous band.” It even exhorts me to “please distinguish it carefully.” So as you can see, one side is little circuits and diodes, and the other side is a bright blue — what one might even call a luminous blue. But the side with the circuits is not sticky. The blue side is tape covering the sticky side. So then the circuits are the “luminous band?” If the reverse side, under the blue tape, is the sticky side, then the circuits are the side that shows; but they’re ugly. Why is that the side that shows?!
And then, I am supposed to “tear off the anti sticking stip [Yup, “stip,” no more than two inches away from the correct “strip.”] of the light strip.” Which is the blue tape, which covers the adhesive back of the LED strip. And then “stick the lamp to the top.” Okay, lamp?! I’ve got an LED strip which you call a light bar — when did we buy a lamp?! And the top of what? This piece I’m supposed to stick the LED strip to is the middle of the headboard: above the large flat surface where the pillows go, below the two shelves. There is a conduit-like space, with a lattice of holes, where light would shine through; presumably that’s where the LED strip goes. But what is the top?
But hey: then I noticed the handy diagram. Which shows two light strips, their plugs at opposing ends, and they are somehow — invisible? And I am supposed to “Stick it here.”
Which I assume either means I should stick them to the instruction paper — or that there is an irritated Chinese manual writer who is telling me where I can stick my light bar. Where the sun don’t shine, of course.
This is when we looked online for help. We looked at the images of the bed on Amazon, hoping to see what it looks like assembled. This, apparently, is it.
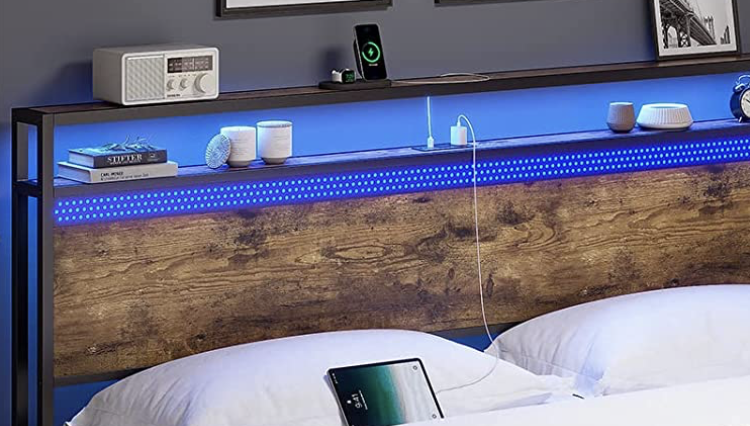
So okay, see the strip of blue light circles above the wooden headboard? That’s the piece where we’re supposed to stick the light strip “to the top.” There’s a space where the lights could go behind that lattice of holes — but it looks BLUE here. So are we supposed to stick the blue side of the LED strip to the backside of the holes?! We can’t: the blue has to come off to expose the adhesive. Are the little circuits and diodes supposed to go inside of the lattice? Or to the top of the conduit space, under the shelf above? The problem there is that the top of the conduit space in the metal bar has holes where bolts are supposed to go to hold the bar to the shelf above, and the light strip would at least impede and maybe cover those holes.
Let’s look at the next page of directions. Maybe that will make it more clear.
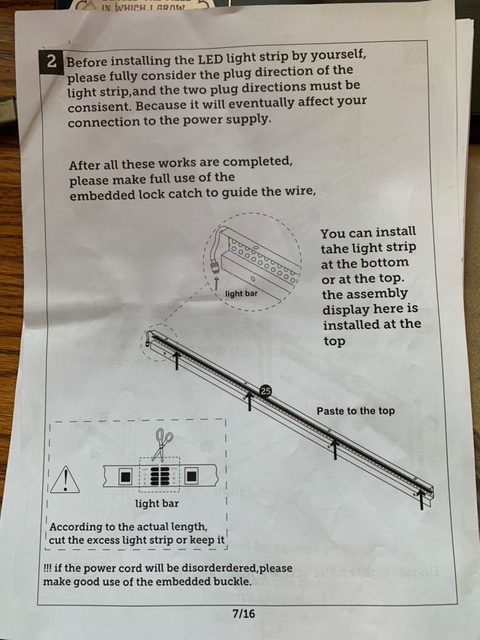
Okay: first of all, why do they highlight that I am installing the light strip by myself? Do I have to send away my helpful panda-wife? Is there an option to not do this by myself, here? Can I call for help and they will send an LED strip installer out to do this for me? Secondly, they make a big deal of installing the two light strips with the plugs in the same direction. Which makes sense, and looking at the power cord immediately shows that the two light strips plug into one power cord, so you need the plug-ends of the light strips close together. No problem.
The problem is that they haven’t yet told me about installing the second light strip. Unless I’m supposed to install two inside the holed conduit bar. One on the top and one on the bottom, maybe? But then if you look at the “Stick it here” image of the diagram THE PLUGS ARE ON OPPOSITE ENDS OF THE TWO INVISIBLE CORDS.
Also, there is no embedded lock catch. Or embedded buckles. Nothing embedded at all. (I suspect they meant “included,” and decided to call the buckle a “lock catch.” Sure, why not; I wouldn’t call it a buckle, either.)
Whatever: this page of instructions pretty clearly shows the light strip going on the underside of the top of the metal bar with the lattice of holes. Where it gets in the way of the screw holes — also visible in the diagram here. Maybe, since I am actually supposed to cut the light strip if it is too long, I should also cut space for the screws to go through the light strip?!
So in the end, we skipped this step, assembled the headboard, and then went back and adhered the light strip to the bottom of the lattice conduit, so it wouldn’t interfere with the screws. (Yes, we did have to cut off the excess of the LED strip, which gave me fits of cognitive dissonance, but worked fine.) And then adhered a second LED strip to the bottom of the top shelf. The result was this:

Once we figured out how to handle the LED issue, by ignoring it while we put the frame together, the instructions got pretty reasonable.

Other than “Do not tighten the screws, just fix them,” this was a good page of instructions. (And sure, I hand-tightened the bolts without really ratcheting them tight until the whole things was assembled. I just think that “tighten” is less intense than “fix,” so the emphasis here is strange.) The next page was irritating again:

Which side is the inside? (when assembled, of course) The side closest to the wall, or the side closest to our heads? My helpful panda said it should be the wall side, so we went with that. Sure, why not. At least we kept the plug direction consistent when we were pasting the sticky side opposite the luminous band to the bottom of the component along with the unfolded light bar stuck to the inside of the top of the front iron plate.
But then…

I’m sorry, I’m to LEAK the cord?! And which side is the “signal receiving end,” exactly?!
Well. At least NOW I can tighten all the screws. But I have no idea what to do with this power cord thing.

Okay. Now I got it. The top line of instructions? Most helpful ones yet. (Also “Shunt Interface” is the name of my new EDM band.) Totally made it clear what the buckles were, what size they were, how to use them and why. All made sense. I appreciate that they repeated the instructions for the Strap magic tape I am to use to bind the wires if they become disordered. They did not, so I did not use the Strap magic tape. I also have not scanned the QR code to get the app to control the lights yet; there is a remote that does it fine, and I can’t imagine wanting to change the LED lights with my phone instead. But I can, if I want to. So I got that going for me.
Okay: home stretch.


“A small sealing pocket” is a small plastic bag. And they call these things “crash pads” here, and then “anti-collision cushion” in the last instruction. Both terms are accurate: before we adhered those with the handy strips of Doubie faced adhesive tape, sticking them at an acute angle, Toni slammed her leg into it and gouged out quite a chunk of flesh. So always use your crash pards, okay?
And if you buy an unassembled bed frame, make sure you cooperate with your helpful panda. And build it on level ground.
Sweet dreams, everyone.